Administration of Users in Okta
The Adtran SSO/IDP system commonly deployed with Mosaic One utilizes a 3rd party solution from Okta. If your organization has provided an alternate SSO solution, much of the details in the following article will not apply, however, the principles of user management are the same.
Only the designated group administrator within your organization has access to the tools described here. If multiple administrators with this capability are required, please open a support request with Adtran Product Support to request that additional administrator accounts be created.
If you are an existing Mosaic One user experiencing difficulty logging in or are a new user who does not yet have access credentials, please contact your IT department.
As part of the turn up of your Mosaic One instance, the designated administrator will receive a welcome email from Okta that contains an activation link. Make note of the link for future reference. Follow the prompts presented for activation, creating a password, then complete the login sequence.
Multi-Factor Authentication (MFA) is required for access to the Okta Administration Console. You will be prompted to configure an MFA method/device as part of the activation process. Okta offers their own Smartphone app for this (available for both Android and iOS) but most popular, 3rd party alternative authentication apps are also compatible.( e.g. 1Password, Onepass, Microsoft Authenticator, iCloud Passwords to name a few.) Follow instructions provided by your preferred MFA software to complete the authentication process with Okta. These one-time steps are self guiding and self explanatory.
Once logged in, the default landing page is presented. Select the Admin button to proceed to user administration functions.

In addition to the instructions provided here, further context sensitive help is available from within the Okta portal with coverage for additional features of that portal.
Adding Users
Manually add users when they join your org. After you add the user, you can assign them to apps and groups and manage their profile.
- Using the Okta URL provided to you in the activation email referenced above, login and navigate to the Admin Console. (The URL will resemble https://Adtran-YOUR_COMPANY_NAME_HERE.okta.com.)
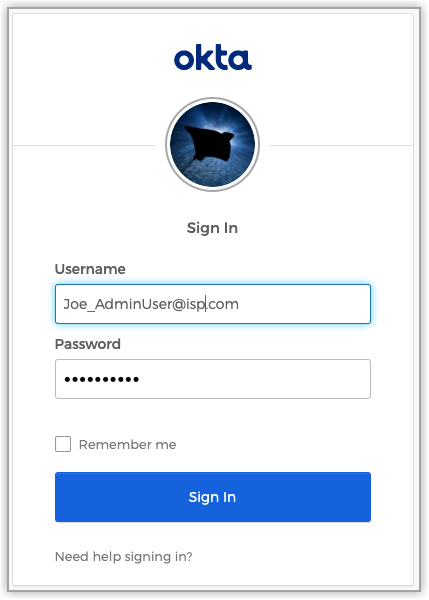
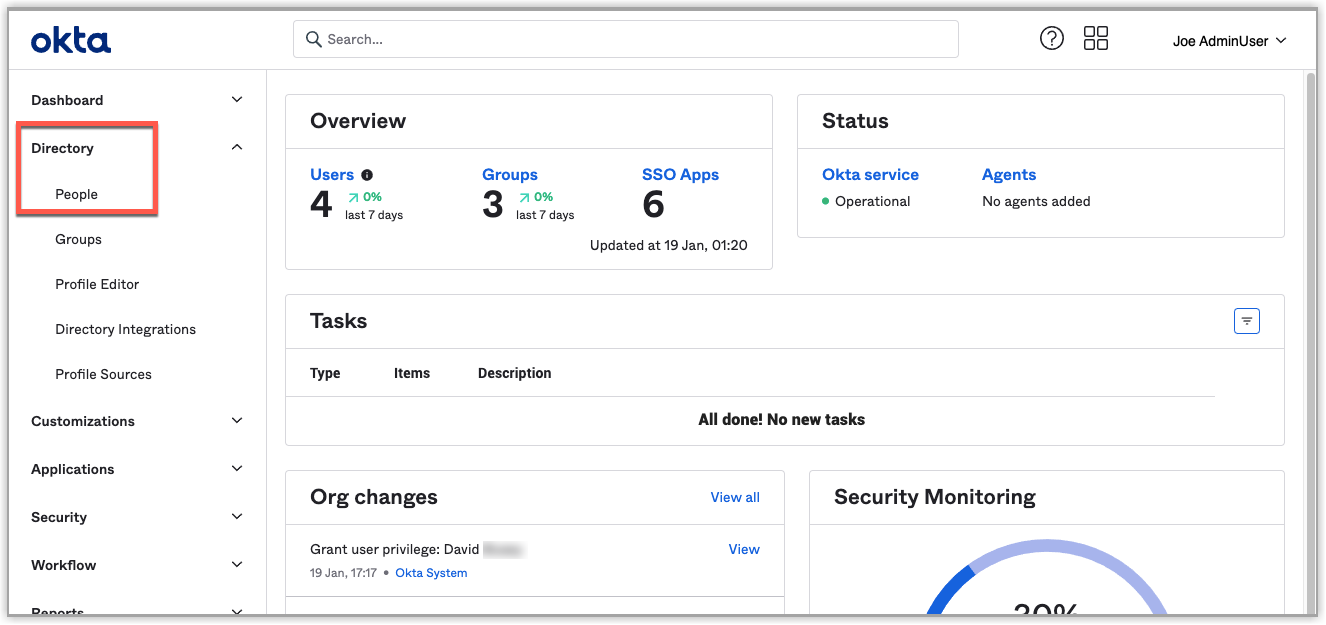
- In the Admin Console, go to Directory > People.
-
Select Add Person.
-
Accept the default User type.
-
Complete the remaining fields as follows:
-
First name — Enter the user's first name.
-
Last name — Enter the user's last name.
-
Username — Enter the user's user name in email format.
-
Primary email — Enter the user's primary email if it's different from their username.
-
Secondary email — (Optional) Enter a secondary email to allow the user to access information when their primary email is unavailable.
-
Groups — This field is pre-populated with the correct, default group. Continue to the next field.
-
Password — Select Set by user to allow the user to set their password. (The Set by admin option is not recommended.)
-
Send user activation now - (Optional) This check box is available when Set by user is selected as the password option. Select this check box to send a user activation email to the user.
-
User must change password on first login — This check box is selected by default when you select Set by admin as the password option. It is recommended to accept this default.
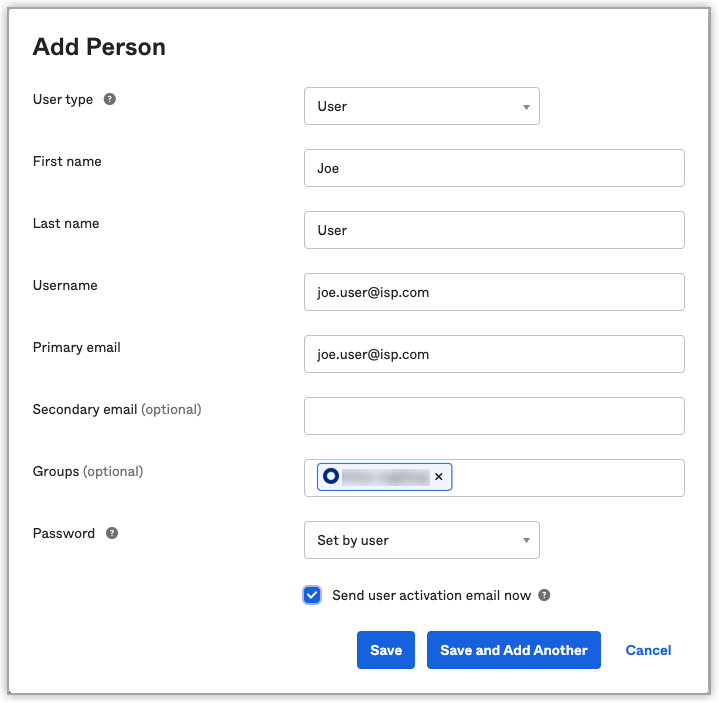
- Select the Save button or select Save and Add Another to add another user.
- The users receives an activation email that contains a link and instructions how to proceed.
How to Resend the Activation Email
Discussed in this section are the basic steps for an Admin user to resend the activation email for an Okta Directory user who has not yet activated their account. This work-flow can be performed by either a Super Admin, or an Okta Directory Group Manager.
-
Using the Okta URL provided to you in the activation email referenced above, login and navigate to the Admin Console. (The URL will resemble https://Adtran-YOUR_COMPANY_NAME.okta.com.)
-
In the Admin Console, go to Directory > People.
-
From the list of users, select the name of the user to whom the activation e-mail should be re-sent. Note that the user should be tagged as Pending user activation.
-
Select the Resend Activation Email button.
-
In the confirmation dialogue, select the Resend Activation Email button.
Deactivate and Delete User Accounts in Okta
Deleting personal user accounts and user data can help you satisfy data protection and disposal laws in your region. As users are added, reassigned, or terminated, you can deactivate or delete user accounts to limit or remove access to org resources.
In order to delete a user account, it must first be deactivated. Instructions for both are below.
When you deactivate a user account, the account status moves from active to deactivated. Deactivated users can no longer access their assigned applications. When you reactivate a previously deactivated user account, you might need to reassign some apps to users. Some apps might be reassigned by group memberships or rules. Deactivation runs as a background task, and depending on the number of users being deactivated, can take significant time to complete. You can perform multiple deactivation requests at the same time. During deactivation, notifications appear indicating the progress of all deactivation requests. A notification appears when each deactivation request completes successfully.
When you delete a user account, a deletion cannot be undone. Users identified as the technical or billing contact cannot be deleted. Multiple deletion requests can be performed at the same time. The permanent deletion of customer data is automatically initiated after 30 days.
This table describes the actions taken when a user is suspended, deactivated, or deleted.
Deactivate a User Account
-
Using the Okta URL provided to you in the activation email referenced above, login and navigate to the Admin Console. (The URL will resemble https://Adtran-YOUR_COMPANY_NAME.okta.com.)
-
In the Admin Console, go to Directory > People > More Actions > Deactivate.
-
Select the user accounts to be deactivated by the checkbox to the left of the username. One or more users may be selected for deactivation.
-
Select the Deactivate Selected button.
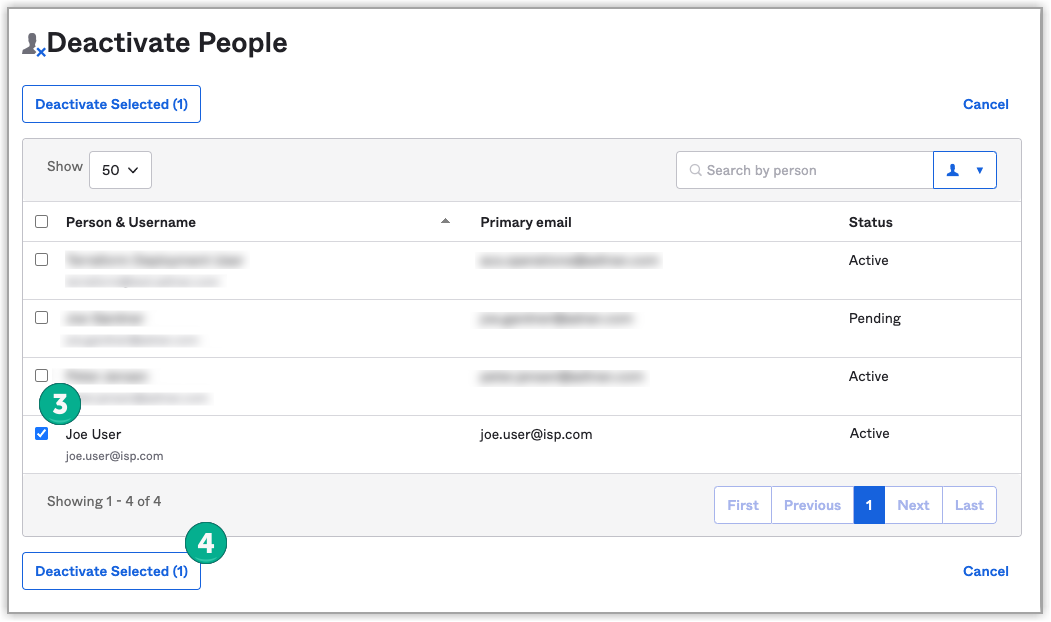
- In the Deactivate Person dialog box, select Deactivate.
After deactivation of a user account, re-activation is necessary if you wish to make changes to it.
Delete a User Account
In order to delete a user account, it must first be deactivated. See instructions above for deactivation steps.
-
Using the Okta URL provided to you in the activation email referenced above, login and navigate to the Admin Console. (The URL will resemble https://Adtran-YOUR_COMPANY_NAME.okta.com.)
-
In the Admin Console, go to Directory > People.
-
Select a user name in the Person & Username column.
-
Select Delete.
-
Select Delete in the Delete Person dialog box.
Import Users to Okta From a CSV File
You can add new users in bulk or update existing Okta users by uploading a CSV file of user information. This function includes validation and error reporting of the imported data.
-
Using the Okta URL provided to you in the activation email referenced above, login and navigate to the Admin Console. (The URL will resemble https://Adtran-YOUR_COMPANY_NAME.okta.com.)
-
In the Admin Console, go to Directory > People.
-
Select More Actions, and then choose Import Users From CSV.
-
In the Import Users from CSV window, select the this template link to download a template CSV file.
The template includes headers for all of the attributes defined in your current Okta user profile.
-
Complete the attribute fields (login, firstName, lastName, and email).
Do not delete the first row header. Subsequent rows must contain one user in each row with all mandatory information entered in the correct columns. You do not need to enclose entries in quotations. Do not leave columns empty unless the same column is left empty for all rows and they are not mandatory attributes. The entries ,, and ,"", are identical and are treated as empty strings.
-
Select Upload CSV.
A validation process runs to make sure that the file is properly formatted.
-
Correct any errors or note the success message, then select Next.
-
In the Import Users from CSV window, enable the option for Automatically activate new users.
-
Select Import Users.
Okta validates that the CSV file is formatted correctly and that all attribute requirements are met. A summary lists the number of new users, uploaded users, unchanged users, and the number of users that incurred errors. If errors are found, select the Download link to view the error report.
Reset a User Password
To reset a user password, follow these steps...
-
Using the Okta URL provided to you in the activation email referenced above, login and navigate to the Admin Console. (The URL will resemble https://Adtran-YOUR_COMPANY_NAME.okta.com.)
-
In the Admin Console, go to Directory > People.
-
Select Reset Passwords.
-
(Optional) Filter the list by selecting Locked out, Expired token, or All.
-
Select a user, then select Reset Password.
-
Select Reset Passwords in the Reset Password dialog box.